
Optimal distance between grow lights and seedlings: practical guide
Finding the ideal distance between horticultural LED lights and seedlings is essential for healthy growth. If a lamp is set at the wrong height, stems may become leggy or leaves may scorch, seriously affecting plant development. This guide explains how to find, adjust and maintain the right lamp position according to its output, the growth stage and how your seedlings respond.
How far should a grow light be from seedlings?
The distance between the light and the top of the seedlings directly affects how much useful light their leaves absorb. This light intensity, measured in PPFD (photosynthetic photon flux density), plays a key role in photosynthesis and the shape of young plants. It is essential to balance sufficient brightness with thermal safety to protect cotyledons and the first leaves.
Ideal height during germination
During germination, position a 150W lamp around 25 cm above the trays to provide a PPFD of about 150–200 µmol·m⁻²·s⁻¹—ideal for stimulating cotyledons without causing stress. When the first leaves appear, gradually increase the lamp-to-seedling distance to 30 cm to maintain moderate light intensity and encourage strong roots and sturdy stems. Learn how to position your lamp correctly to support your crops when natural light is limited.
- Output 5–7 W (GU10) : Position the lamp 10 to 30 cm away to light small pots effectively without overheating delicate plant tissue.
- Output 20 W (E27) : Maintain a distance of 20 to 60 cm depending on the species, favouring the upper end of the range for the most delicate plants.
- Output 30 W (long-throw lenses) : Choose 20 to 100 cm to cover several rows evenly while maintaining consistent light intensity.
For 60W to 120W modules used on shelves or green walls, maintain a distance of 30 to 80 cm to distribute light evenly without creating dark areas.
Adjusting the light based on plant signals
Seedlings show their light requirements through clear visual signs. Thin stems and pale leaves indicate insufficient seedling PPFD: lower the light by 5 to 10 cm. Conversely, scorched leaf edges indicate too much light: immediately increase the distance by 10 to 15 cm to protect the seedlings and maintain thermal safety.
Measure and check regularly
Use a tape measure to check the distance between your grow light and the top of the tallest seedlings. Repeat the measurement every two to three days during germination, then weekly once the first true leaves have formed.
Follow up with a simple heat test: hold your hand at seedling level for 30 seconds. If it feels close to 30°C, raise the lamp by 5 cm. A PAR meter can then confirm that PPFD is between 150 and 300 µmol·m⁻²·s⁻¹ during germination and between 200 and 400 µmol·m⁻²·s⁻¹ during growth, giving you precise control over light intensity.
Settings for a 300W grow light
Modern 300W horticultural LED lights offer an excellent balance of output and energy efficiency. To get the best results, it is essential to manage the distance between the light source and your plants correctly. During the vegetative stage, adjust this distance gradually to meet the changing needs of your crop.
Maintaining the target PPFD
With a 300W grow light , the recommended distance is generally between 30 and 45 cm. This range provides an ideal PPFD (200–400 µmol/m²/s) for plant development. Here are a few practical guidelines:
- Seedling stage : position the lamp 30–35 cm away to provide enough light without stressing young shoots.
- Early growth : increase the distance to 40–45 cm when the first true leaves appear.
- Optimal DLI : aim for a daily light integral (DLI) of 12–16 mol/m²/day by combining the right distance with a 12–16-hour photoperiod.
If your readings exceed 400 µmol/m²/s, immediately move the lamp 5 to 10 cm farther away. This helps maintain the ideal light intensity and prevent damage to delicate plant tissue.
How spectrum and heat affect distance
Modern horticultural LED lights often feature a full spectrum enhanced with blue wavelengths (400–500 nm). This can sometimes allow you to reduce the distance slightly (by 2–3 cm) while maintaining the desired PPFD and encouraging compact growth.
Watch the temperature. If the room gets above 26°C, increase the distance by another 5 cm to protect your plants from excessive heat. This simple adjustment balances thermal management with effective lighting.
Light coverage and uniformity
To distribute light evenly across your entire crop:
- Choose wide beam angles (≥120°) for larger areas
- Use narrower beam angles when working with smaller areas
Practical tip: use a PAR meter to check that the lighting is even. Measure PPFD at several points (centre and corners) and adjust the height until the difference between readings is less than 15%. This method gives all your seedlings an equal start.
Distance and safety with high-output lamps
Lamps over 600W provide much more light and heat for young seedlings. These models are better suited to professional growing or large spaces, and require careful distance adjustment to achieve optimal PPFD and effective photosynthesis while keeping seedlings thermally safe.
Start high, then fine-tune
When using grow LEDs above 600W, initially set the light 60 to 90 cm away. This protects seedlings from scorching and light stress. Always start at 90 cm, then gradually reduce the distance week by week in 5 to 10 cm steps, watching your seedlings closely as they develop.
- Germination : Keep the lamp 80–90 cm away to protect delicate cotyledons from excess heat or light.
- Cotyledons appear : Lower the lamp to 70–80 cm as the first embryonic leaves develop, gradually increasing light intensity.
- Leaf development : Set the lamp 60–70 cm away when three or four true leaves have appeared, optimising photosynthesis while maintaining thermal safety.
If you notice gradual yellowing or whitish spots, the light is probably too intense. Move the lamp 10 to 15 cm farther away. A quick response prevents oxidative stress and preserves the vitality of your seedlings.
Recognising overexposure
Leaf temperature is the most reliable indicator: above 30°C, thermal safety is compromised and seedling metabolism slows. An infrared thermometer can measure leaf temperature accurately without touching the plants.
Substrate that dries too quickly and needs watering more than once a day is a clear sign of excess heat. In this case, increase the distance by 10 cm or add gentle ventilation to lower leaf temperature by 2–3°C.
HID and CFL/T5 specifics
400W MH lamps must be positioned at least 48 cm from seedlings because they emit more infrared radiation than LED lights of equivalent output. 315W LEC/CMH models need around 51 cm because of their significant UV component.
By contrast, CFL or T5 fluorescent tubes produce little heat and a moderate PPFD, so they can be positioned very close to plants (1–5 cm). This is particularly suitable for miniature crops or sensitive species, allowing highly precise control without the risk of scorching.
| Lamp type | Output | Distance during germination | Distance during growth |
| Full-spectrum LED | 150 W | 25–30 cm | 45–50 cm |
| Full-spectrum LED | 300 W | 30–45 cm | 45–70 cm |
| Full-spectrum LED | ≥600 W | 80–90 cm | 60–80 cm |
| MH (metal halide) | 400 W | ≥48 cm | 35–40 cm |
| LEC/CMH | 315 W | ≥51 cm | 45 cm |
| CFL/T5 fluorescent | Variable | 1–5 cm | 1–5 cm |
Practical tip: keep a log of every distance adjustment, PPFD reading, observation, date and lamp output. These records will help you progressively refine your grow-lighting routine and achieve increasingly consistent results.
LED grow-light solutions
Our professional horticultural lighting solutions use high-end LEDs suited to every type of indoor growing. With over ten years of experience, we have determined the optimal seedling-to-LED distance for each model. This makes setup simple and delivers consistent results from the first use.
Recommended positions for our products
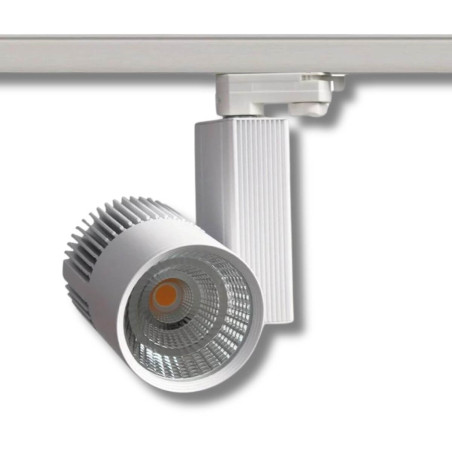
For small growing areas, position our 5–7W GU10 bulbs 10 to 30 cm above the pots. This ideal distance is perfect for young seedlings or delicate cuttings that need precisely controlled lighting. See our recommendations for choosing the optimal distance for your grow lights according to their output and type.
Thanks to its optimised lenses, the 10W GVL SPOT V4 is best installed at a height of 40 cm to cover a 50 × 50 cm area effectively—the standard dimensions of a market-garden seed tray. The height-adjustable 20W E27 models (20 to 60 cm) let you match light intensity precisely to the seedlings' heat sensitivity and growth stage. seedlings.
Even coverage for your trays
The 90 cm SpectraLINE V2 bar, positioned 20–30 cm above the seedlings, evenly lights an area measuring 110 × 30 cm. Its Samsung full spectrum optimises photosynthesis without causing leggy growth. The modular system lets you link several units while maintaining an even light height and increasing the growing area.
For multi-level installations, maintain the same 20–30 cm distance on every shelf. The 40 or 100 cm cables make it easier to adjust the overall height without changing the gap between the LED grow lights and the plants. This provides even lighting and simplifies daily management, with exactly the same light conditions on each level.
Practical shelving example
Consider a four-tier metal shelf for vegetable seedlings: each tier holds a 24W (90 cm) SpectraLINE bar suspended 25 cm above trays that are 30 cm wide. The modules are linked by 40 cm cables, keeping them electrically synchronised while still allowing the height of each bar to be adjusted individually as the plants grow.
When planting becomes denser or the area exceeds the coverage of one bar, add a second unit offset 5 to 10 cm higher. This overlap ensures even light across 20–30 cm. The modular setup maintains the ideal distance, makes height adjustments easy and leaves room to expand later with additional LED grow lights .
Practical guide to growing with LEDs
For successful LED growing, use a flexible approach and adjust each day according to how your seedlings look. Combine these observations with objective light readings and you will quickly build reliable expertise for consistent, high-quality harvests.
Gradual adjustment routine
Start with your lights at the maximum recommended distance for their output, then reduce the distance by 5 cm every two or three days during the seedling stage. After the first true leaves appear, leave about a week between adjustments so the plant can adapt without heat stress. This gradual approach avoids light shock and strengthens seedlings from the vegetative stage onward.
- Automatic adjustment : when seedlings gain 5 cm in height, raise the lights by 2–3 cm to maintain optimal PPFD and prevent excessive light intensity.
- Transition to vegetative growth : when moving from seedlings to the vegetative stage, bring your LED lights slightly closer (by 5–10 cm) while checking that PPFD does not exceed 400 µmol·m⁻²·s⁻¹.
- Photoperiod : provide 12 to 16 hours of light each day to achieve an ideal DLI (12–16 mol·m⁻²·day⁻¹) and compact seedlings.
- Accurate tracking : record every change (date, distance, PPFD readings and temperatures) to build a useful reference for future crops.
Fast-growing species such as lettuce need more frequent checks (every three to four days), while plants such as tomatoes tolerate less frequent adjustments (every seven to ten days). Adapt the schedule to each variety to save time and maintain balanced growth.
Avoiding common mistakes
A 50W lamp positioned 30 cm away often produces less than 30 µmol·m⁻²·s⁻¹—too little for successful germination. In that case, move the light closer or choose a more powerful lamp. With 250W MH lamps, maintain a distance of 40–45 cm during growth to prevent heat stress in young seedlings.
Seedlings leaning towards the light usually indicate that PPFD is too low or uneven. Solution: reduce the distance by 5 cm or add a second light to the side for more even coverage.
If leaf temperature exceeds 30°C, even with a good PPFD, photosynthesis slows and seedlings suffer water stress. Move the lights slightly farther away or add gentle ventilation (below 0.5 m/s) to cool the air without drying out the substrate.
When and how to supplement natural light
In winter, even a bright window does not provide enough natural light. Switch on your horticultural lights from germination onwards so young seedlings receive optimal lighting and do not become leggy.
To supplement low sunlight, position your LEDs at the recommended distance and switch them on when natural light falls below 100 µmol·m⁻²·s⁻¹ (often in the morning and late afternoon). This hybrid approach makes the most of free natural light while providing the required DLI and improving your setup's energy efficiency.
Frequently asked questions
How far should a 20W LED light be from seedlings?
For a 20W LED light , keep your seedlings 40 to 60 cm away to start. This distance from the lamp provides an ideal PPFD (150–300 µmol·m⁻²·s⁻¹), which is right for photosynthesis without the risk of heat stress. When the cotyledons open, gradually move the light closer to 20–30 cm, making adjustments over two to three days. Watch the plants: overly pale leaves indicate a lack of light, while scorched leaves mean you should move the lamp farther away.
How can I tell if my seedlings are getting too much or too little light?
Your seedlings will tell you! Low light intensity shows up as stretched stems and pale-green leaves: reduce the distance by 5–10 cm. Conversely, scorched leaves or excess heat (check with your hand) mean the lamp is too close. Move it 10–15 cm farther away to avoid heat stress and adjust the PPFD.
Should I adjust the distance between the lights and plants as they grow?
Absolutely! Adjusting the distance is essential throughout the growth cycle. When your seedlings grow by 5 cm, raise the lamp by 2–3 cm to maintain the right PPFD. During the vegetative stage, move the lights slightly closer (5–10 cm) to increase the light. But take care not to exceed 400 µmol·m⁻²·s⁻¹, the ideal limit for safe, effective photosynthesis . Keeping the right distance between the lights and your plants helps them grow strong and healthy.
These distance guidelines also apply to planted walls: find out how to light a green wall properly according to its height and the available distance.
Related posts
 Discreet Green Wall Lighting: LED Design Guide
 Recessed Directional Grow Spot: A Guide for Plants and Green Walls
 Recessed LED Grow Bars for Green Walls: 2026 Comparison Guide